n8n: store data inside n8n (Data tables)
A data table is a simple table, like a spreadsheet tab, that lives inside your n8n. Your workflows can add rows to it and read them back later: a list of newsletter signups, orders, customers you already answered, and so on. You do not need Google Sheets or any other account.
| Time needed | 15 minutes |
| You need | An n8n agent from LusoVPS (Sign in and build your first AI agent) |
| Result | A data table with your own columns and rows, and a workflow step that reads it |
In this guide we make a table called Newsletter signups with three columns: name, email and signup_date. The signup form recipe fills it from a web form, and the weekly report recipe counts the new signups every Monday.
1. Create the data table
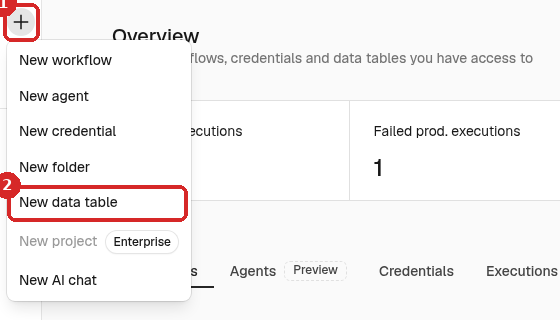
- Click the + at the top of the menu on the left (1).
-
Choose New data table (2).
-
The window Create new data table opens:
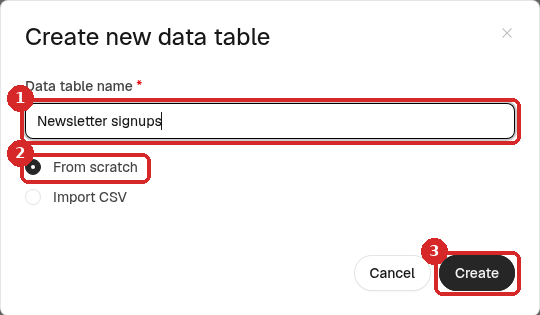
- Data table name: we typed
Newsletter signups. - Keep From scratch. (Import CSV starts the table from a CSV file instead.)
- Click Create.
- Data table name: we typed
The empty table opens. It already has three columns that n8n fills in by itself: id (the row number), createdAt (when the row was added) and updatedAt (when it was last changed).
2. Add your columns
- Click Add Column at the top right (1).
- Name (2): the column name. We typed
name. -
Type (3): click it and choose what the column holds (4):
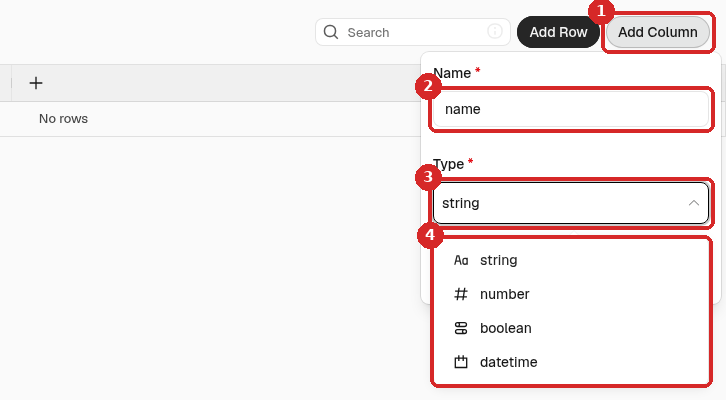
Type For string Text: names, emails, notes number Numbers: prices, quantities boolean Yes/no (true/false) datetime A date, or a date and time -
Click the Add Column button under Type. The column appears in the table.
We repeated this for email (string) and signup_date (datetime).
Use short names without spaces
Your workflows use the column names, so names like email or signup_date (lowercase, no spaces) are easiest to work with.
3. Add rows by hand
- Click Add Row at the top right. A new row appears, and the first column opens for typing.
- Type the value and press the Tab key to go to the next column.
-
A datetime column opens a calendar:
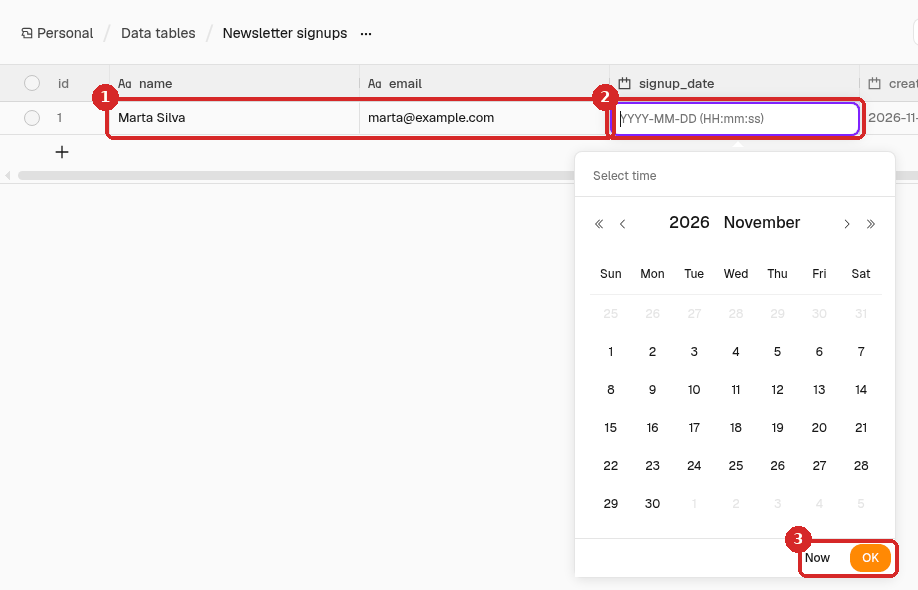
- The values you typed (Marta Silva, marta@example.com).
- The date box. Click a day in the calendar, or type the date as
YYYY-MM-DD, orYYYY-MM-DD HH:mm:sswith a time (we typed2026-10-20 09:30:00) and press Enter. - Now puts the current date and time; OK saves the date you picked.
Each change is saved straight away; there is no Save button. We added three rows:
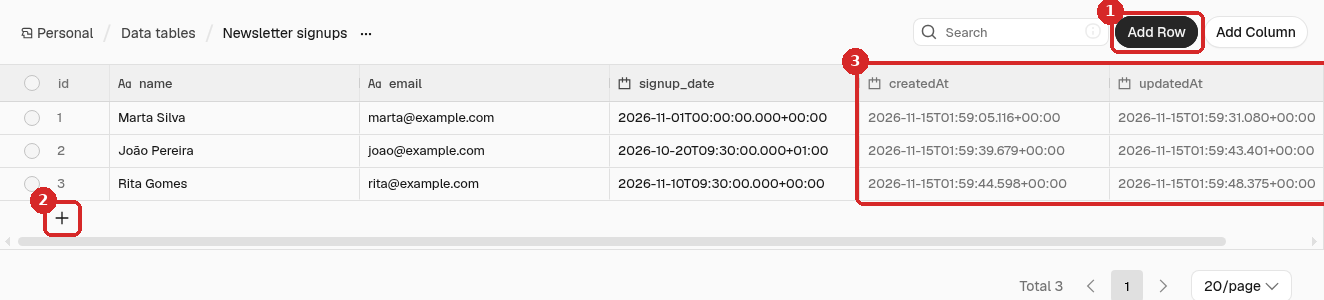
- Add Row adds another row.
- The + under the last row does the same.
- createdAt and updatedAt were filled in by n8n.
To change a value later, double-click the cell, type, and press Enter.
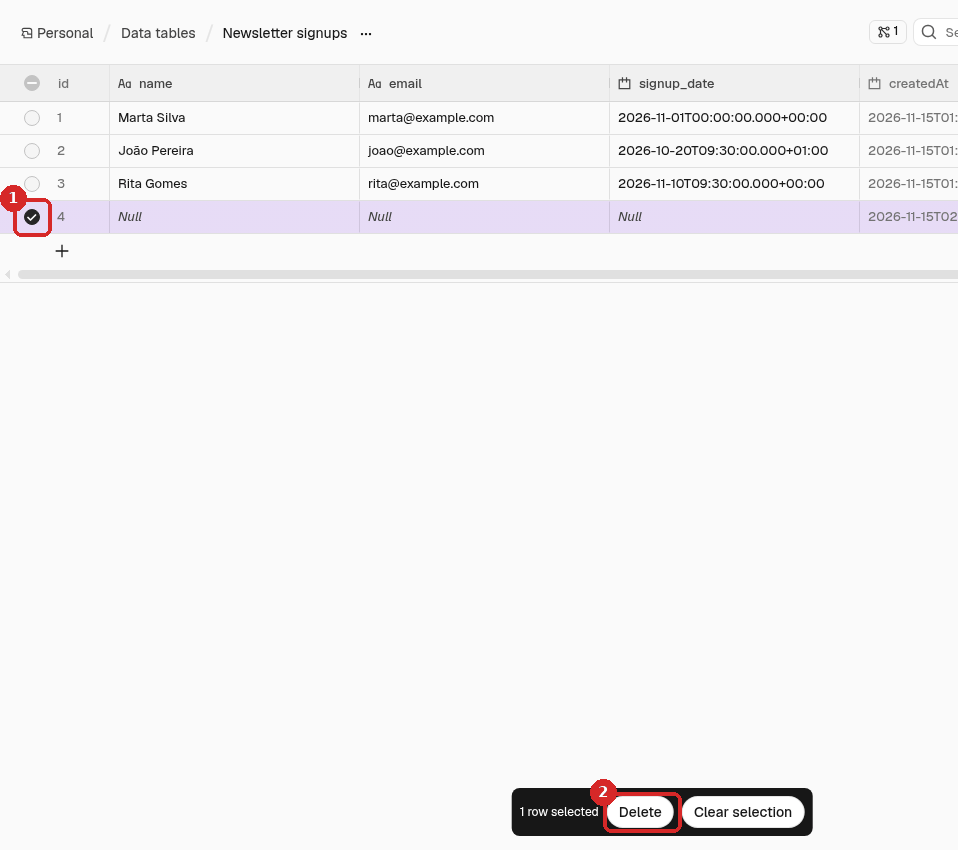
To delete a row, click the round box at its left (1), then Delete in the black bar at the bottom (2). n8n asks Are you sure you want to delete 1 row?: click Delete.
4. Find your tables again
-
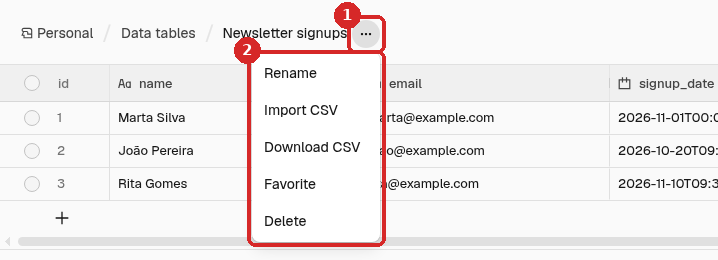
The ... menu next to the table name (1) has Rename, Import CSV, Download CSV (a copy of the table for Excel), Favorite and Delete (2).
-
All your tables: click the house icon (Overview) in the menu on the left and open the Data tables tab (1). Each table shows its size, the number of columns and when it was last updated (2). Click a table to open it.

5. Use the table in a workflow (Data table step)
Workflows read and write the table with the Data table step.
-
In a workflow, click the + at the right of a step, type
data tableand press Enter. The list of Actions opens: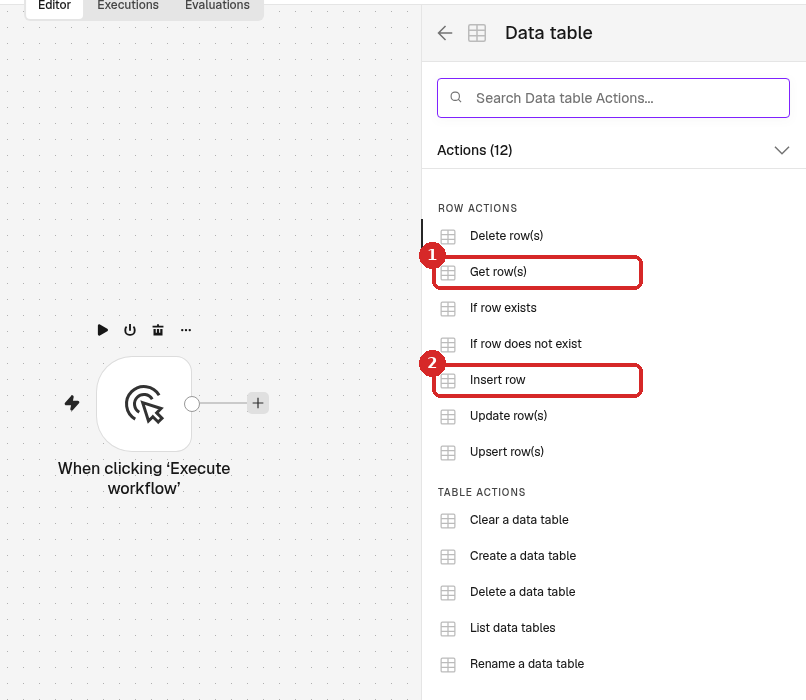
- Get row(s) reads rows.
- Insert row adds a row.
The other row actions: Delete row(s), Update row(s), Upsert row(s) (update the row if it exists, otherwise add it), and If row exists / If row does not exist, which let the workflow continue only when a matching row is (or is not) in the table. The TABLE ACTIONS create, clear, rename, list or delete whole tables.
-
We chose Get row(s) after a Trigger manually step and set it:
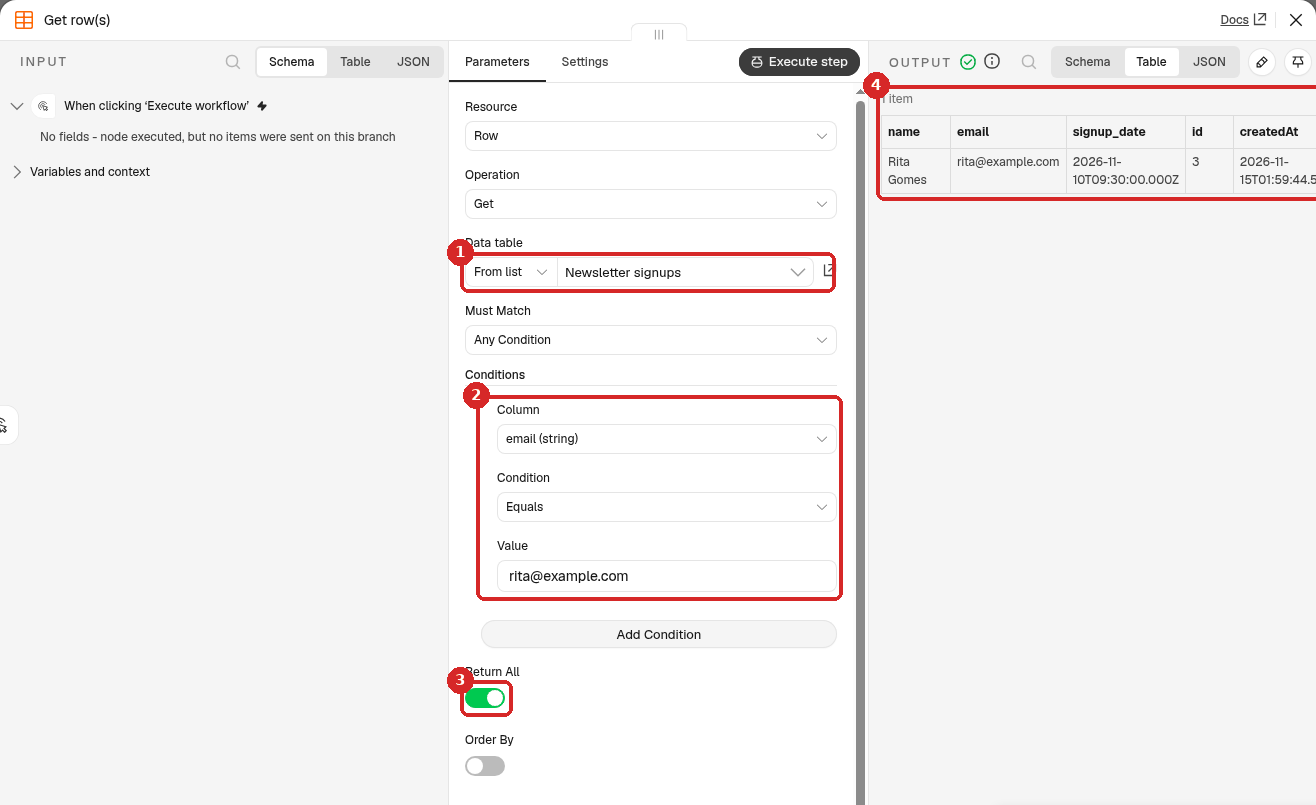
- Data table: From list → Newsletter signups.
- Conditions: click Add Condition to read only some rows. We chose Column email (string), Condition Equals and Value
rita@example.com. With no condition, the step reads all rows. - Return All: on, so you get every matching row (when it is off, Limit Per Input Row caps the number, 50 by default).
- After Execute step, the OUTPUT shows 1 item: the row of Rita Gomes, with all its columns.
Without the condition, the same step returned our 3 items.
The Condition list also has Not Equals, Contains, Greater Than, Less Than (useful for dates and numbers), Is Empty and Is Not Empty.
Insert row works the other way round: for each column, you set the value that should go in, usually with an expression from an earlier step. The signup form recipe shows it step by step.
Check that it worked
- Overview → Data tables lists your table.
- Your rows are still there after you reload the page.
- A Get row(s) step with no condition returns as many items as the table has rows (Total at the bottom of the table).
Common problems
The Data table field in the step is empty
Click Choose... in Data table and pick your table. If it is not in the list, check its name in Overview → Data tables. The list also has Create new data table.
Get row(s) returns nothing
No row matches the condition. Check the Value for typos and extra spaces. For text, Equals needs the exact text; Contains (Case-Insensitive) is more forgiving.
A date shows another hour than the one I typed
n8n saves dates with their time zone. In our test, 2026-10-20 09:30:00 was shown as 2026-10-20T09:30:00.000+01:00 in the table (Lisbon summer time) and as 2026-10-20T08:30:00.000Z (UTC) in a workflow's OUTPUT. It is the same moment, written in two time zones.
I want the data in Excel
Open the table, click the ... next to its name and choose Download CSV.