n8n: receive data with a webhook
A webhook is a web address that starts your workflow when something sends data to it: a contact form on your website, an online shop, a payment service or another app. In this guide you create a webhook in n8n, test it, and put it live.
| Time needed | 15 minutes |
| You need | An n8n agent from LusoVPS (see Sign in and build your first AI agent). To send a test, a terminal with curl (we used one on Linux) |
| Result | A live web address that starts your workflow every time it receives data |
Anyone who knows the address can call it
A webhook address works without a password unless you set one (Authentication in the Webhook step). Do not post it in public places. Use a path that is hard to guess, or set Authentication, for anything important.
Each webhook has two addresses:
| Test URL | Production URL | |
|---|---|---|
| Looks like | https://yourname-n8n.agents.lsvps.net/webhook-test/... |
https://yourname-n8n.agents.lsvps.net/webhook/... |
| Works when | You click Listen for test event, for one call | The workflow is published, for every call |
| Use it for | Building and testing | Your website or app, for real |
1. Create a workflow with a Webhook trigger
- Click the + at the top of the menu on the left and choose New workflow.
- Click the name My workflow at the top and give it a name, for example Contact form webhook.
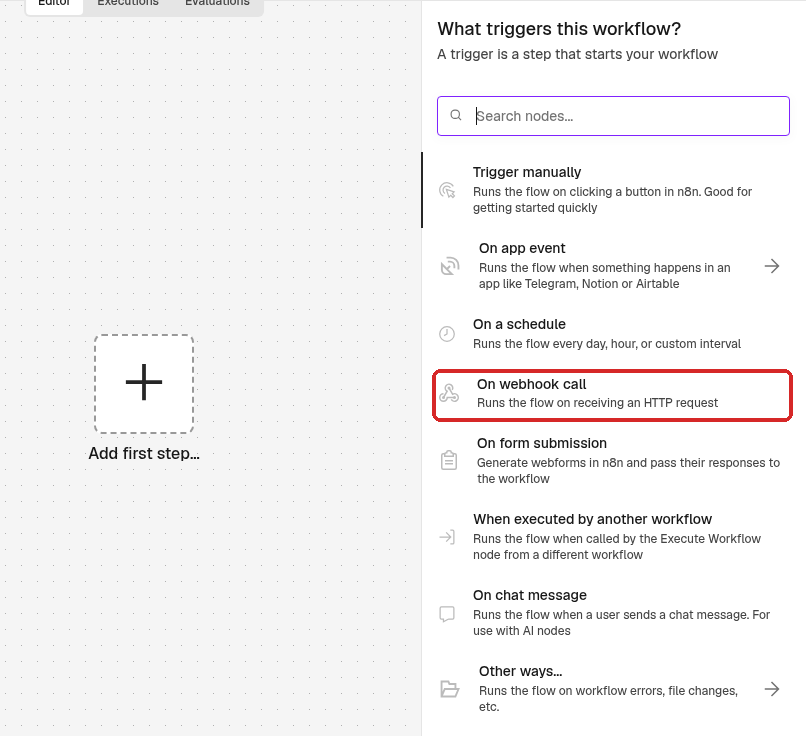
- Click Add first step. In What triggers this workflow?, choose On webhook call.
2. Set up the Webhook step
The Webhook step opens.
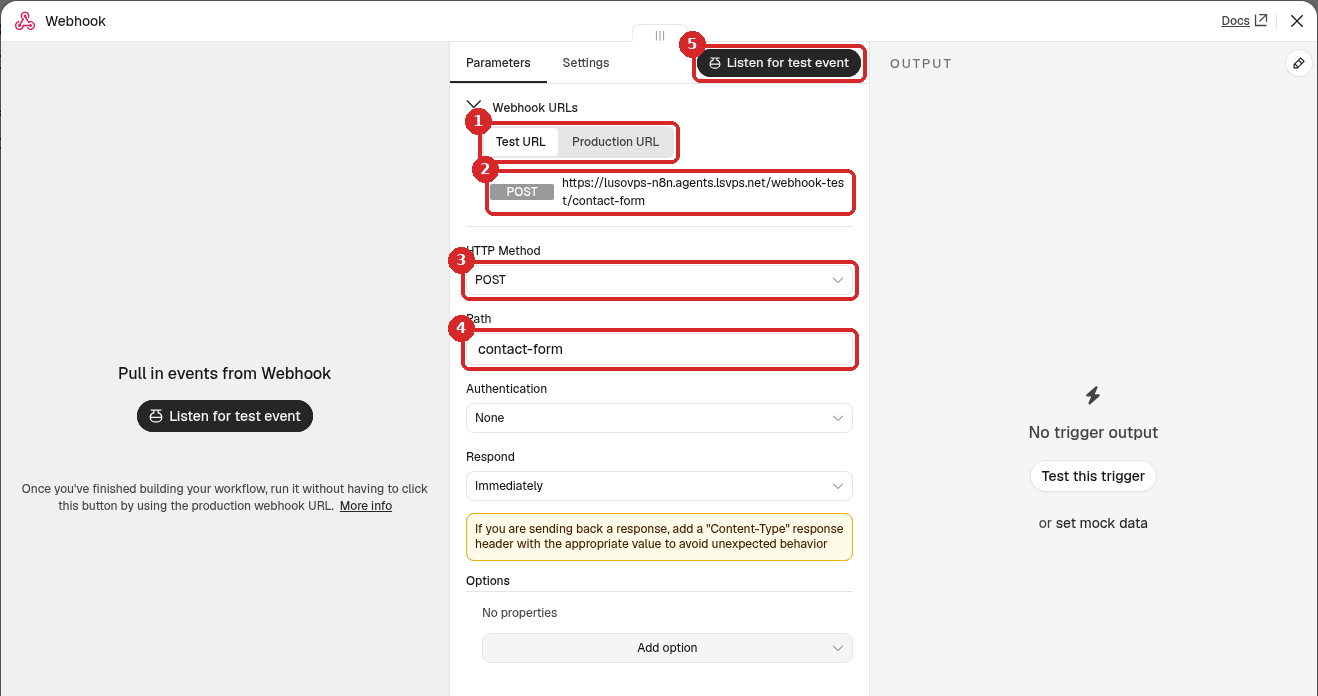
- Test URL / Production URL switch between the two addresses.
- The address itself. Click it to copy it (n8n shows URL copied).
- HTTP Method: how the data is sent. Most forms and apps send data with POST. Choose what the sender uses.
- Path: the last part of the address. n8n fills in a long random code; we changed it to
contact-form. Use only letters, numbers and dashes. - Listen for test event makes the Test URL wait for one call.
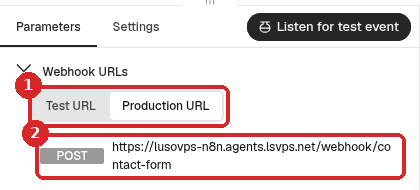
Click Production URL (1) to see the live address. Note it down for later: you give this one to your website or app.
3. Send a test
-
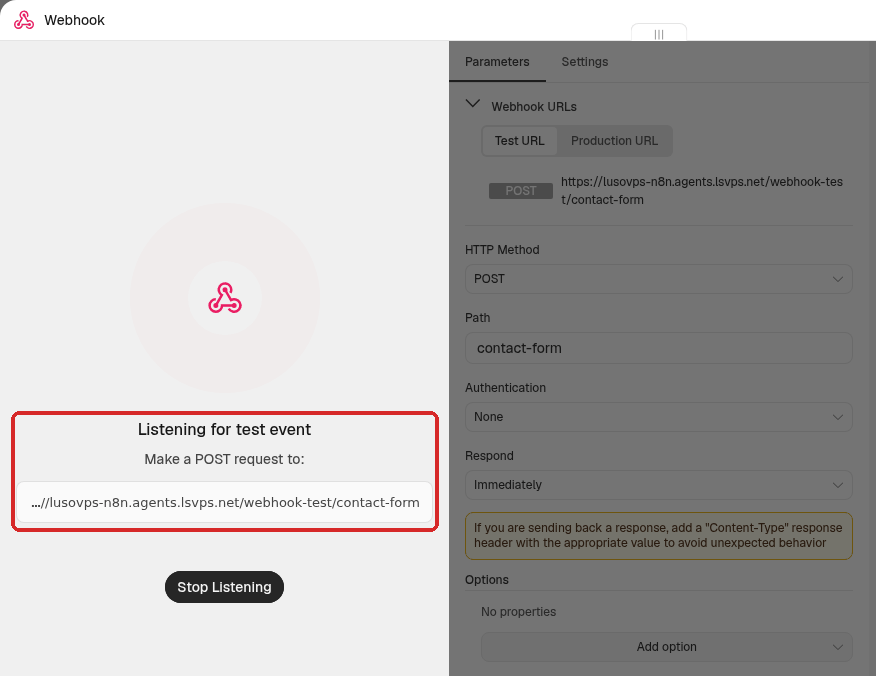
Click Production URL again back to Test URL, then click Listen for test event. n8n shows Listening for test event and the address it waits on.
-
Now send data to the Test URL. Normally your website or app does this. To try it yourself, open a terminal and run (with your own address):
curl -X POST https://yourname-n8n.agents.lsvps.net/webhook-test/contact-form \
  -H 'Content-Type: application/json' \
  -d '{"name":"Ana"}'
n8n answers:
-
The Webhook step shows what it received in OUTPUT:
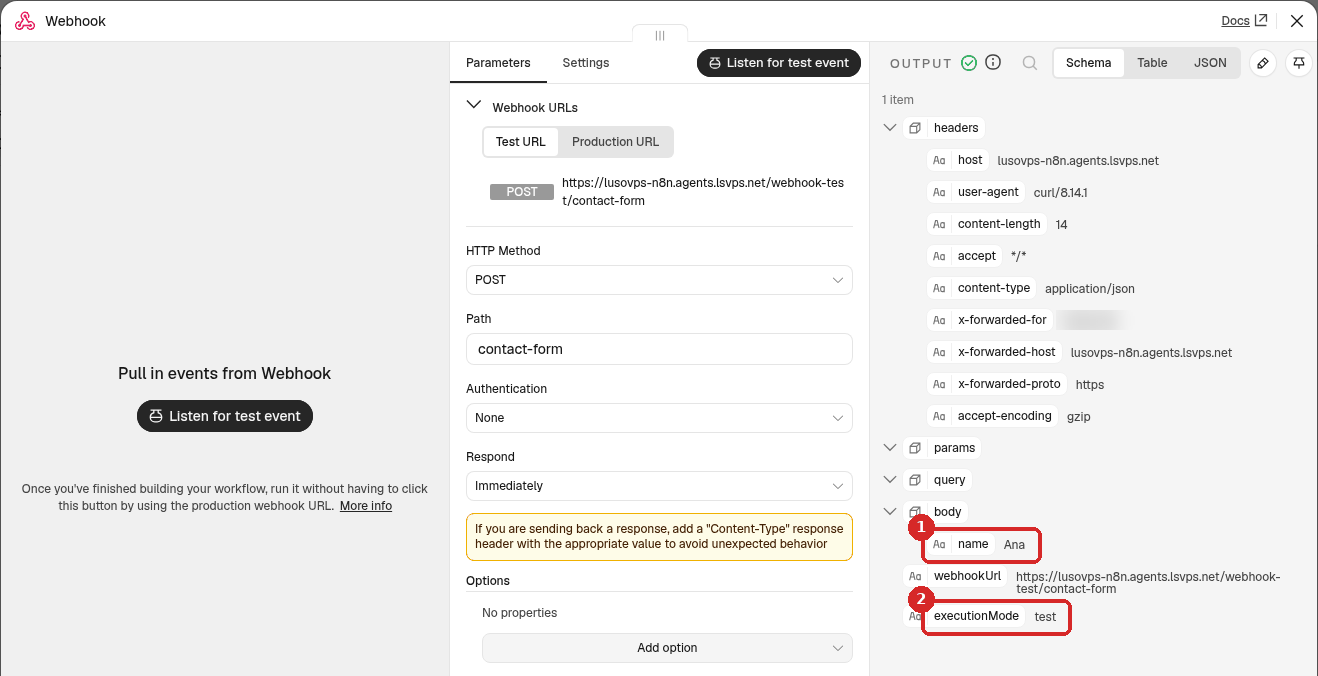
- Under body: the data you sent (
name: Ana). - executionMode: test means it came through the Test URL.
The headers list technical details of the call (which program sent it, and so on).
- Under body: the data you sent (
-
Close the step with the X. Now add the next steps, for example an AI step that answers, or a step that sends you an email. Click the small + at the right of the Webhook step to add one. The data you received is available to them.
Note
The test address works for one call only. To test again, click Listen for test event again.
4. Publish the workflow
- Click Publish at the top right.
-
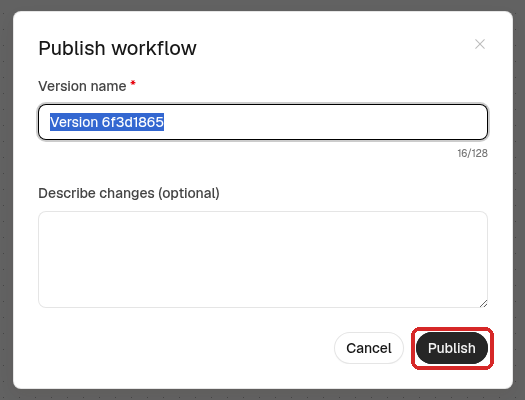
n8n suggests a Version name. You can keep it. Click Publish.
-
The button now says Published, with a green dot.
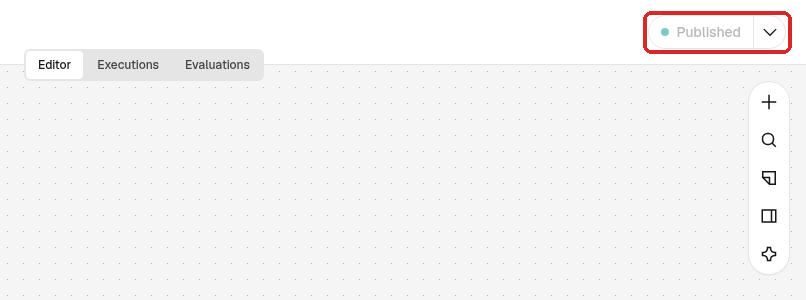
From now on the Production URL works all the time, even when n8n is closed in your browser.
5. Use the production address
Give the Production URL (with /webhook/, not /webhook-test/) to your website or app. To try it with curl:
curl -X POST https://yourname-n8n.agents.lsvps.net/webhook/contact-form \
  -H 'Content-Type: application/json' \
  -d '{"name":"Ana"}'
n8n answers {"message":"Workflow was started"} again.
Check that it worked
Open the Executions tab at the top of the workflow.
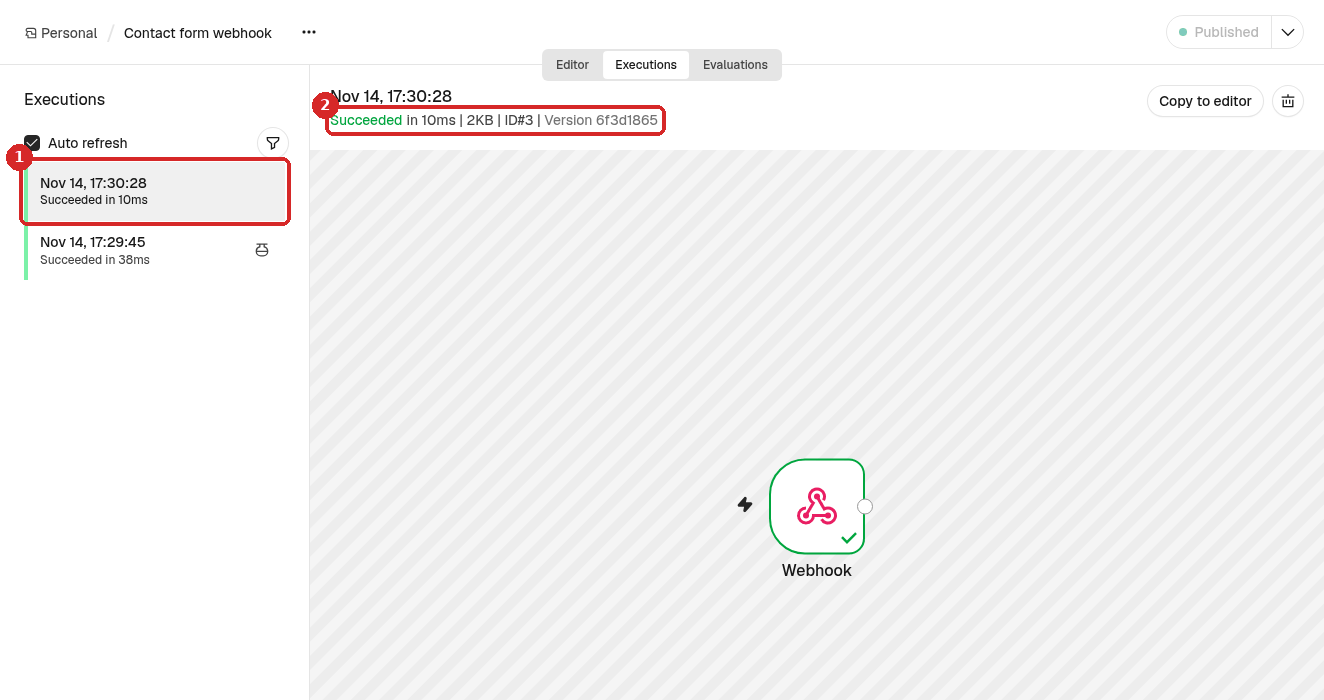
- There is a new run for each call, with Succeeded.
- The run shows the Version that was live when it ran.
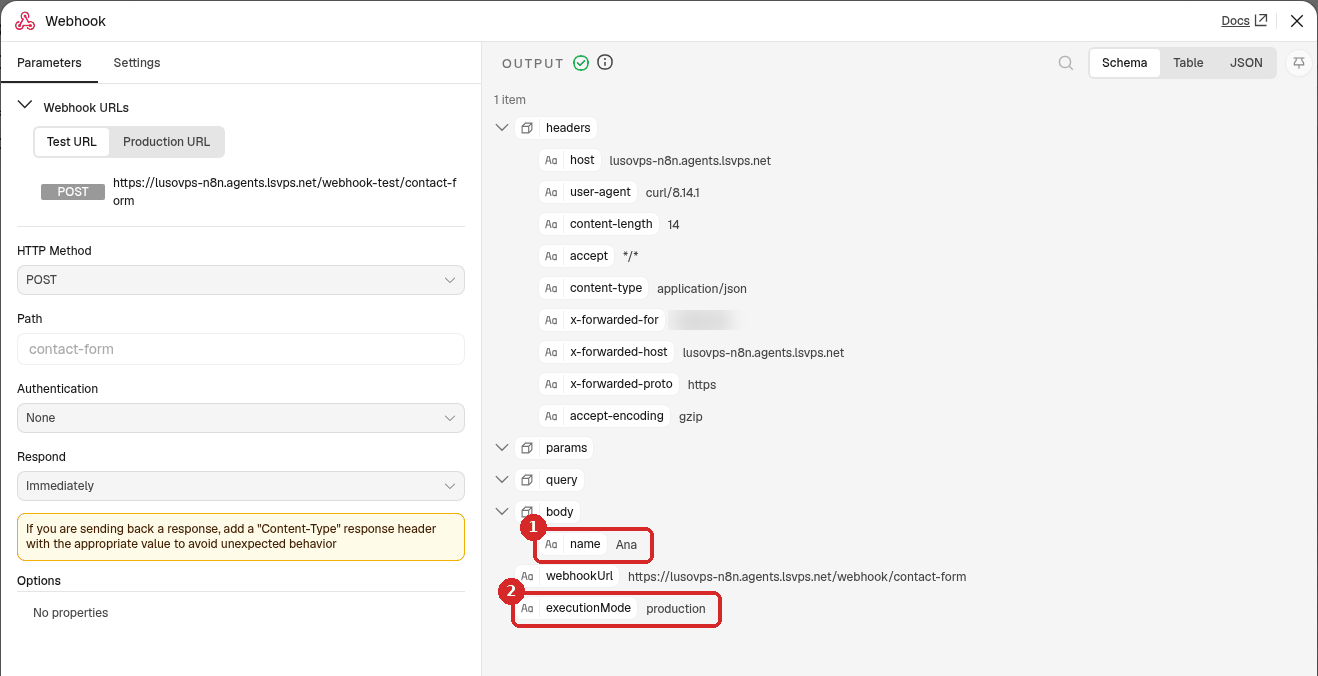
Double-click the Webhook step in that run to see the data. executionMode is now production (2), and the data you sent is under body (1).
Common problems
The answer says: The requested webhook \"...\" is not registered
You called the Test URL (/webhook-test/) without clicking Listen for test event first, or you already used it once. In our test the full answer was: Click the 'Execute workflow' button on the canvas, then try again. (In test mode, the webhook only works for one call after you click this button). Click Listen for test event and send again, or use the Production URL of a published workflow.
The answer says: This webhook is not registered for GET requests
The sender uses a different method from the one in HTTP Method. In our test, a GET call to the POST webhook (a browser address bar also sends GET) answered: This webhook is not registered for GET requests. Did you mean to make a POST request? Change HTTP Method to match the sender, then Publish again.
The production address does not work
Check that the workflow says Published at the top right, and that you use /webhook/ and not /webhook-test/. If you changed the workflow after publishing it, click Publish again. When the workflow is not published, n8n answers The requested webhook "POST contact-form" is not registered. (its hint still talks about a "toggle": in this n8n version that is the Publish button).
How do I stop the webhook?
Click the arrow next to Published and choose Unpublish. n8n asks you to confirm (This will prevent all production executions to this workflow until you publish again.): click Unpublish. The Production URL stops working until you publish again.