n8n: a quick tour of the screens
This guide shows you around n8n: where your workflows, keys and run history are, and what the buttons in the workflow editor do.
| Time needed | 10 minutes |
| You need | An n8n agent from LusoVPS, signed in (see Sign in and build your first AI agent) |
| Result | You know where everything is in n8n |
A few words you will see everywhere:
- A workflow is a chain of steps that runs on its own.
- A node (or step) is one box in a workflow, for example "receive a message" or "ask Claude".
- A trigger is the first step: it decides when the workflow starts.
- An execution is one run of a workflow.
- A credential is a saved key or password that steps use to connect to other services.
1. Overview: your workflows, keys and runs
After you sign in, n8n opens Overview (the house icon in the menu on the left).
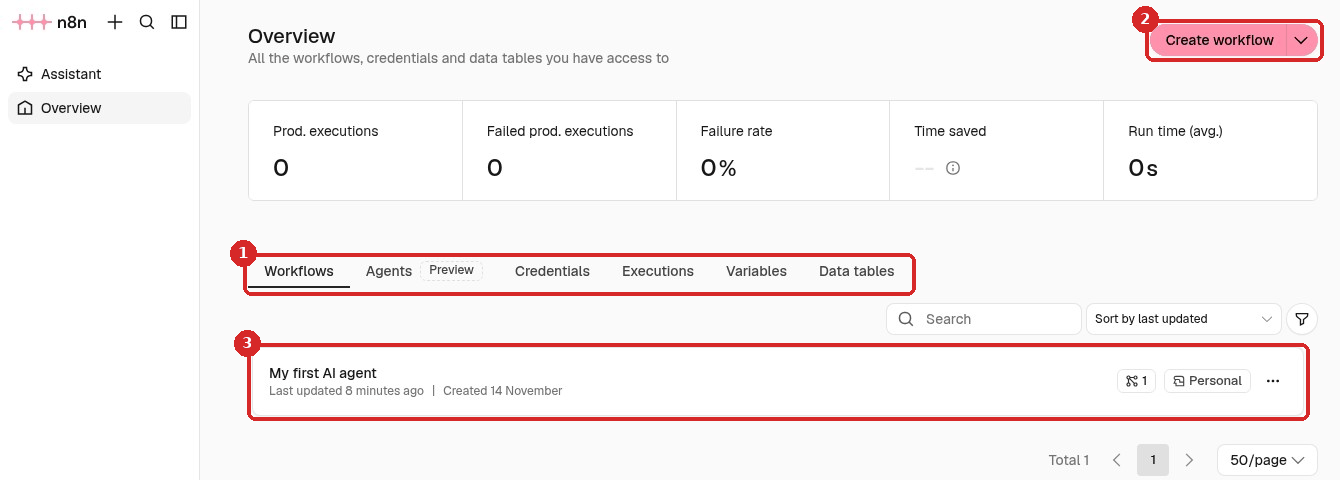
- The tabs:
- Workflows: all your workflows.
- Credentials: your saved keys (for example your Anthropic account).
- Executions: the history of every run of every workflow. See See what a workflow did and fix errors.
- Agents, Variables and Data tables are extra features. You do not need them to start.
- Create workflow opens a new, empty workflow.
- Click a workflow to open it in the editor.
The boxes at the top (Prod. executions, Failed prod. executions...) count the runs of your published workflows.
2. The menu on the left
The menu on the left is small (icons only). Click the panel icon at the top to open it with names.
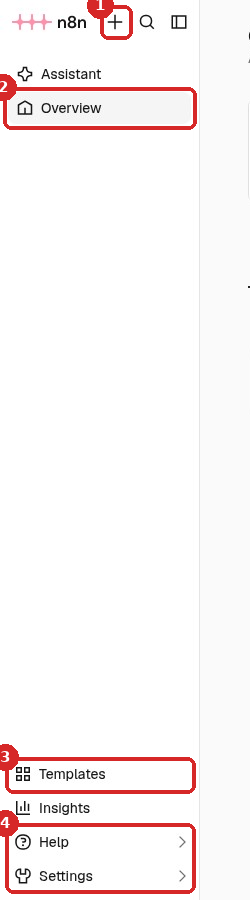
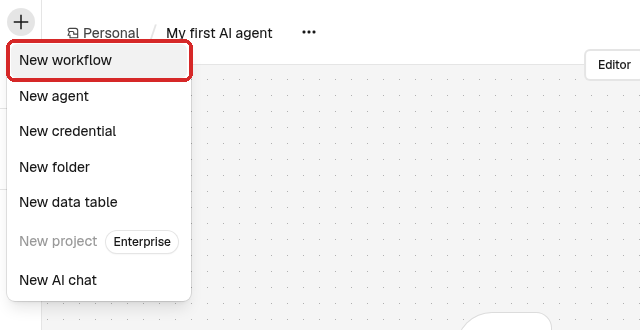
- + creates something new: New workflow, New credential, New folder and more.
- Overview is the home page from step 1.
- Templates opens ready-made workflows on the n8n website, in a new tab. See Start from a template.
- Help (Documentation, Forum, Course and more from n8n) and Settings (Profile & preferences, Users, Sign out and the advanced options of your n8n).
3. The workflow editor
Open a workflow (for example My first AI agent). This is the editor. The big dotted area is the canvas: each box is a step, and the lines show the order.
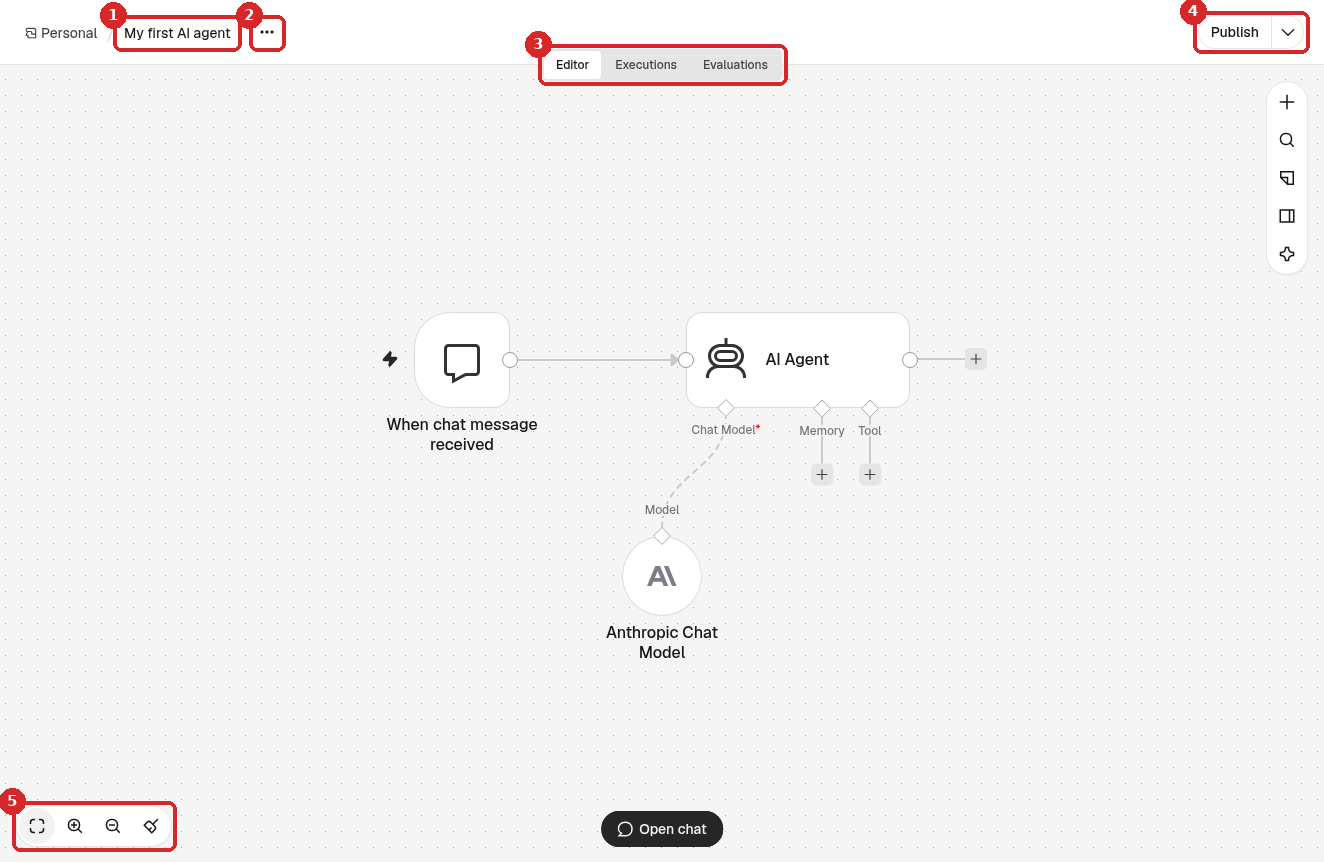
- The name of the workflow. Click it to rename it.
- The ... menu of the workflow (see step 5).
- Editor shows the steps. Executions shows the past runs of this workflow. (Evaluations is for testing AI answers; you do not need it to start.)
- Publish puts the workflow live (see step 6).
- Zoom buttons: fit to screen, zoom in, zoom out.
The + at the top right of the canvas adds a new step. You can also click the small + at the right of a step to add the next one.
Saving
n8n saves your changes by itself a moment after you make them. In our test a changed address in a step was saved after a few seconds without pressing anything. You can also press Ctrl+S (Cmd+S on Mac).
4. Open a step
Double-click a step on the canvas to open it.
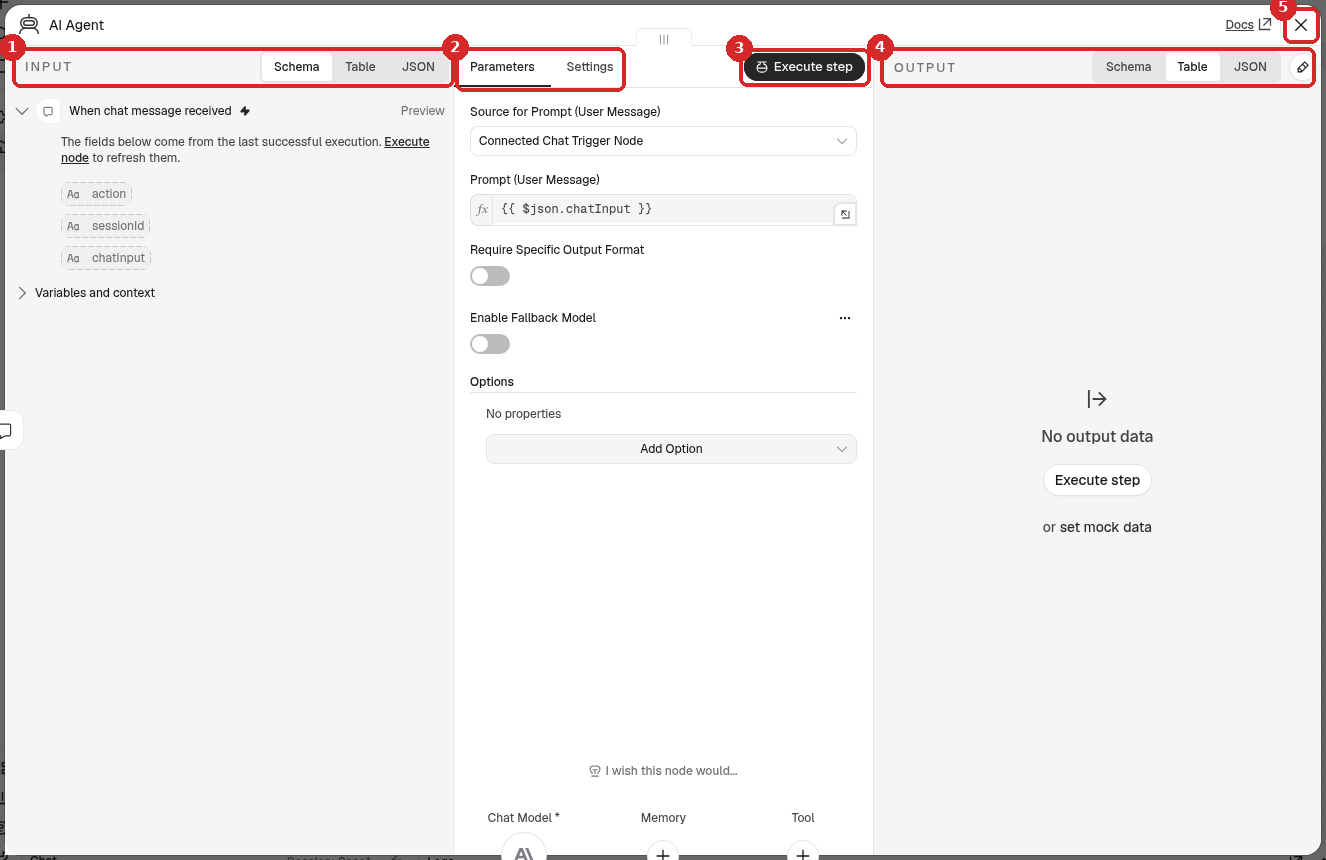
- INPUT: the data that reaches this step from the step before.
- Parameters are the settings of the step. Settings has extra options (for example what to do on error).
- Execute step runs only this step, to test it.
- OUTPUT: the data this step produced the last time it ran. Use Schema, Table or JSON to change how it is shown.
- The X closes the step and takes you back to the canvas.
5. The workflow menu (...)
Click the ... next to the workflow name.
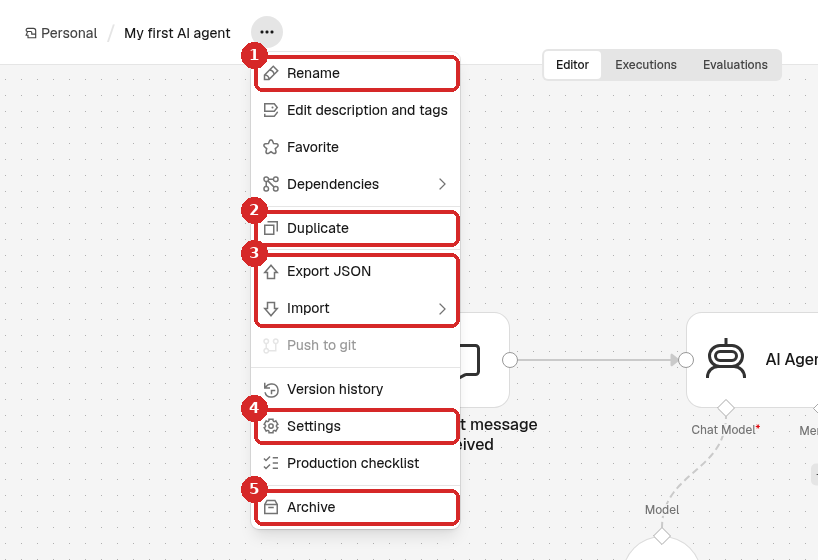
- Rename the workflow.
- Duplicate makes a copy, so you can try changes safely.
- Export JSON downloads the workflow as a file, and Import loads one. See Download a workflow and import it back.
- Settings of the workflow: time zone, which runs to keep, and more.
- Archive removes the workflow from the list. n8n then shows a message with Delete permanently, to delete it for good (n8n asks you to confirm with Yes, delete).
6. Publish: put a workflow live
While you build, you test the workflow by hand (for example with Execute or Open chat). To make it run on its own (when a webhook is called, on a schedule, when a message arrives), you must publish it.
Click Publish at the top right. n8n asks for a Version name (it fills one in for you) and you click Publish again. The button then shows Published with a green dot.
The arrow next to Publish opens more options:
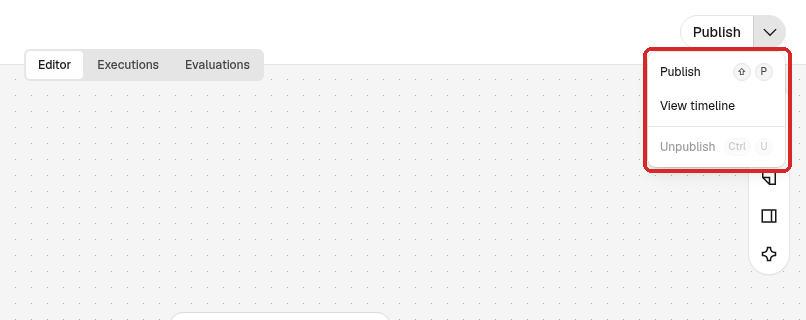
- Publish publishes the current version.
- View timeline lists the published versions.
- Unpublish stops the workflow from running on its own. It is grey when the workflow is not published.
Note
After you change a published workflow, click Publish again so the live version gets your changes.
7. Rename a workflow
Click the name at the top of the editor, type the new name and press Enter.

Check that it worked
- Overview → Workflows lists your workflow with its new name.
- When you open a workflow you see its steps on the canvas, and Executions shows its past runs.
Common problems
I cannot see the names in the menu on the left
The menu is collapsed. Click the panel icon (the square at the top, under the + and the magnifying glass) to open it.
The canvas is empty or my steps are out of view
Click the fit to screen button at the bottom left of the canvas.
I closed the browser before saving
n8n saves by itself a few seconds after each change. Open the workflow again from Overview → Workflows and check the last step you changed.